How to Protect Your Camera Gear in Cold Weather
By Anna Jones at Eversure,
1 November 2024, 12 min read
Winter brings landscapes that beg to be photographed: frost-covered grass, frozen lakes and, if you’re lucky enough, fields blanketed in snow.
However, these photo opportunities assume your camera equipment can handle the cold. Amateur or professional, winter photography requires more than just grabbing your camera and heading outside – the cold demands a little more preparation to make sure all your equipment stays running smoothly.
At Eversure, we know that enjoying the creative process is most important aspect of photography. So, we have created this guide to take you through key considerations for protecting your equipment so you can prevent common cold-weather issues like condensation from hindering your shoot.
Batteries
The first thing you should be aware of, and subsequently prepare for, is how the cold impacts battery life. Cold batteries do not work as well as warm batteries and it is likely a cold battery will only last a fraction of how long it should go when it’s at optimum temperature. To prevent getting halfway through your shoot and discovering the single battery your brought with you has now died, you should not only bring as many spares as possible, but you should also make sure they are all fully charged before you leave.
Allowing your batteries to reach the full ambient temperature of the outside is a sure-fire way of draining your battery. Leaving batteries exposed to winter temperatures is known as cold soaking and affects how well they hold their charge. Keep all spare batteries in your jacket pocket so your body heat keeps them warm. If you discover all your batteries have died, putting dead batteries in your jacket pocket has the potential to revive them and you may find you can shoot with a ‘dead’ battery for a few more minutes.
Condensation

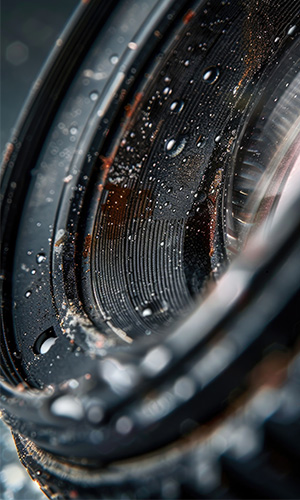
Condensation is the biggest problem you will encounter when photographing in cold conditions. Condensation is caused by dramatic changes in temperature, and it can cause moisture to build up inside and on the outside of your camera. As a result, sensitive components such as the lens, sensor and electronics can be damaged. Condensation could also lead to mould growth or fogged-up lenses that then affect the quality of your photos.
Allowing your camera to acclimatise will help prevent condensation from forming inside your camera. If your camera has been staying toasty in a well-insulated camera bag, then it’s worth removing it from the bag and letting it stand so it reaches the temperature you are shooting in. Remove the battery before you do this to prevent reducing its charge.
This works the other way too; when you bring a cold camera in from the cold straight into warm air, the moisture will condense on the inside and outside of your camera. To prevent this, bring some Ziploc bags with you – they must be big enough that your camera fits inside and the bag zips up. As you are about to head inside, place your camera inside the Ziploc bag and force out as much air as you can before zipping it the rest of the way up. For even more protection, place this inside another Ziploc bag, again extracting as much air as possible. Don’t take the camera out the bag until it is room temperature. Acclimatising your camera should be a slow and gradual process as it is dramatic changes in temperature that causes condensation.
Avoid attempting to heat your camera up under your coat as humid air gets trapped under your coat and sometimes body moisture can cause condensation to build up. As for the rest of your equipment, it is best to keep it in your camera bag.
Lens Fog
The clarity of your photos can be impacted by your lenses and the glass elements of your camera fogging up and frosting over. To prevent this use a lens hood; this will shield your camera from cold air and will help protect your lens against snow and frost as much as possible. Using a rain cover will further provide waterproofed protection.
You can also apply sprays or use anti-fog wipes to keep the glass clear. Avoid using sprays that aren’t compatible with cameras as you may accidentally damage your camera’s delicate coatings.
To prevent moisture forming on the inner surfaces of your camera or lenses, you should refrain from changing your lenses as much as possible. Make sure to keep everything sealed and capped. If you do need to change your lens do this somewhere warmer such as inside your car or in a building entrance. As always when changing lenses, make the switch quickly. This will mean the amount of cold air the inner components of your camera is exposed to is reduced.
If you are a professional photographer, you may consider attaching each of your lenses to a separate camera body. This way you will not have to compromise on the shots you take. Consider investing in a
camera harness that allows you to carry several camera bodies with ease.
Also be aware that frequently wiping your lens will only buy you a small window of time. Wiping your lens often will increase the likelihood of your lens getting scratched as you may unintentionally drag bits of girt or dirt across the lens, which is particularly likely if you are shooting outdoors. Make sure to check your lens before you wipe it as even minor dust can cause scratches when dragged across the lens.
Film Cameras
If you shoot film be aware that film becomes brittle at low temperatures. If you can, try to load, rewind and unload the film in warmer environments such as your home or in your car. When advancing the film, be gentle to avoid it snapping inside your camera.
The lack of humidity in cold air can also have an effect on your film by causing static electricity to build on its surface. Static electricity trails on your film manifest as scratches, spots of lightning-like lines. To avoid this, alongside sparks inside your camera, rewind your film slowly. Slowly winding and rewinding is important to reduce the possibility of running into problems with brittle film or static discharge.
Miscellaneous Moving Parts
Although unlikely, the buttons, dials and zoom and focus rings on lenses could freeze. To combat this, apply a thin layer of lubricant to these parts but again make sure any products you are using are specifically designed for camera equipment. If you discover any buttons, dials or zoom or focus rings have frozen then allow your camera to slowly thaw; forcing your camera to suddenly warm up could damage its fragile components.
Wrap Up Warm

It’s not just your camera that needs protecting from the cold – you do too! Nothing will kill your creativity faster than being too cold. If you have chattering teeth and you’re shaking, you won’t be able to get the shot you want whereas if you are warm, you will have more patience for things such as a tripod failing to extend properly or a lens not autofocusing as it would in normal temperatures.
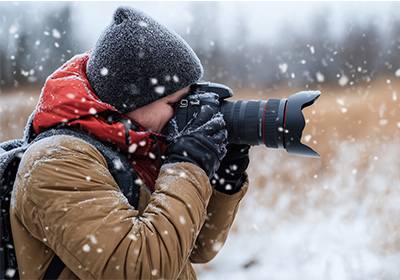
Make sure you are appropriately dressed by having enough layers on. Non-negotiables include suitable footwear paired with thick socks, a waterproof jacket and a hat. Gloves are another winter essential, but they can make it challenging to operate the small, fiddly buttons on your camera. To work around this, consider wearing two pairs: a thin pair for shooting and adjusting camera settings, and a thicker, mitten-style pair to wear over them when you are moving between locations or waiting for the right light. This way you won’t have to sacrifice warm hands for lack of control over your camera equipment and vice versa.
Also consider bringing some hand warmers along with you. Not only will they keep your hands warm, but they can also help keep your camera batteries warm. Since hand warmers are not designed to get really hot, they are safe to store alongside your batteries.
Post Shoot
After shooting in cold conditions, you need to clean and dry all your equipment to avoid any long-term damage.
Use a soft, dry cloth to wipe away any snow, frost or moisture from your lens and camera body before letting it gently air dry. Take out the battery and memory card and inspect to see if there is any moisture in these crevices. Allow them to dry out before reinserting.
Proper camera storage is important all year round, not just during winter but due to the higher levels of moisture and condensation, adequate camera storage is paramount in winter. Improper storage could cause dust damage, battery issues and in extreme cases, mould to begin growing.
Store all your equipment in a cool, dry place to avoid any moistures and condensation building up. You could also place silica gel packets in your camera bag to absorb residual moisture.
Final Thoughts
Please note that the camera you use will determine the specific winterisation steps needed. If you are working with an older, mechanical camera then you must remove any heavy lubricants that could freeze and then cause parts to stick. Instead, apply a low-viscosity lubricant to make sure your camera runs smoothly in low temperatures.
Winter photography can pose unique challenges including risks of water and snow damage as well as accidental drops on icy surfaces. With our camera insurance you can be confident that all your camera equipment is protected against unexpected damage thus allowing you to focus on what matters – capturing the perfect shot.
Now you have the mechanical side covered and your camera is up to the challenge of shooting in lower temperatures, learn more about how to get the perfect photo in winter with our guide here.