How to Take the Perfect Photo in Winter
By Anna Jones at Eversure,
4 November 2024, 10 min read
Are you getting ready to embrace the cold this winter and capture the winter wonderland before you? If you’re not already heading outdoors, then bundle up as you won’t want to miss out on some of the best photo opportunities of the year! Winter brings visuals not found in any other season: frequent frosts, misty mornings, dramatic clouds and sometimes snow-covered landscapes.
This guide explores techniques to help make the most of winter’s unique light and scenery as with a few tweaks to your camera settings you’ll be able to capture the magic of winter perfectly. As well as specific camera alterations, this guide provides compositional ideas for various weather conditions such as snow, fog, mist, frost and ice. As certain winter weather conditions will require you to adjust your settings, we recommend shooting in manual mode where possible. Manual focus is particularly important as autofocus mechanisms can struggle to work effectively in colder temperatures.
Exposure

The exposure settings on your camera will be most important to adjust when you are photographing snow. You will find that when you are shooting a scene that is predominantly white such as a snowy landscape that the camera renders the snow a grey colour. This happens because your camera meter is seeing lot of light. The light meter’s aim is to find an average and turn everything to a middle grey – an 18% grey tone. When the meter detects a lot of bright white light, the meter detects this and reduces the amount of light entering the lens thus turning the white snow into a middle grey. To resolve this, you need to use the exposure compensation feature on your camera.
To photograph a snowy landscape as bright white rather than a dull grey, you will need to increase your exposure by +1 or +2 stops. Exposure compensation instructs the camera to either add or remove a specified amount of light which then allows you to capture the snows’ full brightness and details just as you see it. You may need to be photographing in manual mode to make this alteration to your camera. If you prefer to photograph in program, where the camera sets the shutter speed and aperture itself, aperture priority or shutter priority then you will want to use exposure compensation. Depending on the make and model of your camera, the exposure compensation feature may have to be selected via the camera menu. Alternatively, it could be an external button or dial signalled by a +/- icon. If you are only comfortable shooting in auto mode, then you should select the snow setting from the options in your scene modes. Take a few shots and then regulate your settings.
Graduated Neutral Density Filter
If you are photographing on a snowy but sunny day you may run into issues with contrast. If you expose to capture the details of the blue sky, you risk the snow appearing overexposed and losing its texture and pattern. On the other hand, underexposing your photo to preserve the detail of the snow could render the sky an overly dark blue. Even though a dark blue sky can be dramatic, especially with stormy clouds, it can make the overall scene appear too dark.
To balance this contrast, consider using a graduated neutral density (ND) filter. A graduated ND filter is a rectangular piece of either glass or resin that gradually transitions from dark to clear. This gradient helps block light from one part of the frame and keeps the rest of the frame untouched meaning contrast in scenes with, for example, a bright sky and a darker foreground can be reduced as such scenes tend to exceed your camera sensor’s tonal range. Without a filter, this range difference leads to blown out skies or underexposed foregrounds, and vice versa.
Graduated ND filters are effective for shooting high contrast sunrise or sunset shots where the sky is much brighter than the foreground. To reduce the intensity of the contrast between the sky and the snow, place the darker part of the filter over the snow rather than the sky and you will be able to capture the detail of both elements in the frame. ND filters allow for creative control when capturing movement or emphasising texture as the filter enables slower shutter speeds in bright conditions not otherwise possible without the filter.
White Balance
Snowy landscapes are very cool toned so if you capture them using auto white balance it can give your photos a bluish or greyish hue. To capture warmer, more natural looking whites, try switching off the auto white balance and instead set it manually. To adjust the white balance manually you need to use the Kelvin setting which lets your set the colour temperature of your photo in degrees Kelvin. Lower Kelvin values produce warmer tones whilst higher Kelvin values result in cooler tones. Manually setting the Kelvin allows you to better match the specific lighting you are faced with and achieve your desired colour balance in accordance with the lighting conditions of your scene.
To change the Kelvin setting, you will need to select the Daylight/Shade option in your camera settings and then select either ‘Kelvin’ or ‘Custom’ – these are interchangeable terms. When shooting snowy landscapes, adjust your white balance to a higher Kelvin temperature of around 5500k-7000k as higher Kelvin temperatures preserve warmth and provide a more natural look thus counteracting the blue tone that can appear in cooler lighting conditions. On cloudy days, adjusting the Kelvin temperature is especially helpful as it will make sure you get truer whites in your photos.
In terms of editing white balance post-shoot, shooting in RAW format is best. This provides you the opportunity to refine your photo afterwards to achieve the optimum colour balance. Although you can correct white balance in post-production software, it’s nicer to get it right at the start.
Photo Composition

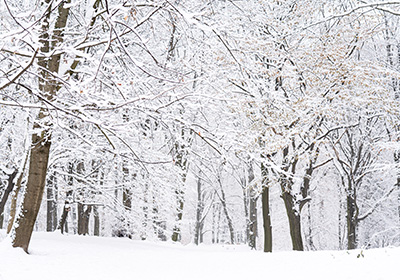
After adjusting your camera settings, you can focus on the composition and consider how to capture the weather conditions you are faced with whether it’s cloudy, icy or anything in between. There are a range of compositions to be experimented with in winter – you can try taking wide angle shots of views before coming closer to capture finer details such as grass crystallised by frost or snow clinging to barren branches.
Every winter large populations of swans, ducks, geese and wading birds gather on British estuaries, lakes and marshes. Other animals are also roaming around in winter such as deer, foxes, pine martens and squirrels and you may be able to spot the birds in your garden easier, especially if you have a garden feeder. During the winter months, animals are more visible and watchable due to the lack of foliage. This makes them excellent subjects for your winter photos and can offer a refreshing change from landscape photos of nature if this what you typically shoot. If you discover you enjoy photographing wildlife, then we suggest you invest in a powerful telephoto lens.
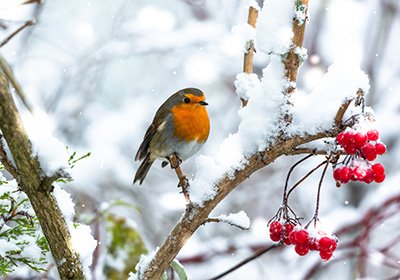
If it has snowed, you should consider capturing the joy snow brings people. You can also play around with colour if people have brightly coloured coats on as this will transform the otherwise monochromatic scene. As snowy landscapes are less textured this pop of colour will create a more interesting composition. You can also play around with negative space as use empty space to create dramatic scenes. Look for striking shadows, sources of contrast such as colour in the presence of an all-white scene as well as other sources of interest such as a robin redbreast or winter berries.
If the weather is forecast to be clear, then why not try to capture a sunrise or a sunset? A benefit of late sunrises and early sunsets is not having to wake up early or stay up late to capture dawn or dusk light. Clear winter weather can result in some really pretty, pink sunrises or sunsets that snow can reflect otherwise sunrises and sunsets are just as captivating regardless of the presence of snow.
Prior to the sun rising or setting, seize the opportunity to capture the blue hour, golden hour’s winter equivalent. Blue hour offers a soft, blue light that makes winter landscapes magical. Be aware this only lasts 20-30 minutes so you need to be quick!
Photographing Different Weather Conditions

Fog & Mist
When fog settles in, photographing distant views can be challenging – but this shouldn’t be seen as a limitation. If you aim to photograph the fog itself or the silhouettes in produces, keep in mind that unless it’s particularly cold, fog and mist will begin to evaporate once the sun rises. A great way to make the most of fog and get some great shots is by climbing to a hilltop as here you will be able to photograph the expansive vistas shrouded in fog.
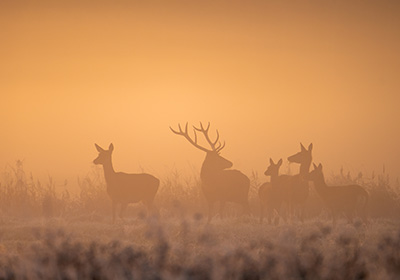
Fog and mist can dramatically enhance your photography especially when the sky is clear as this allows the sunlight to filter through. When sunlight pierces the fog, subjects such as animals or trees become silhouettes, presenting you the perfect opportunity to capture the delicate outlines of skeletal trees or wildlife which can becomes a unique and interesting focus for your photos.
One of the best types of mists to photograph is ground mist. With the rising sun in the background, you can create some amazing shots, especially when it is illuminated by soft morning light.
Frost
The texture of icy grass and frosted fields is really interesting to capture. Frost has a magical quality as it can transform the mundane into subject’s worthy of a photo; crystallised grass is certainly more interesting than ordinary grass. As frost tends to melt once the sun has risen it is best to capture your frosty photographs right after sunrise, before the sun’s warmth has taken hold.
Ice
Ice is an effective subject to photograph in winter due to the interesting textures it can provide as well as the different shapes and forms it can take on. Consider how the ice interacts with its surroundings as the way it clings to branches or covers leaves can be interesting compositions to photograph. Look for icicles, frost on windows or frozen ponds.
Snow
In addition to challenges of exposure when photographing snow, capturing its beauty can also be difficult due to its featureless nature. To achieve the best landscape photos of snowy scenes, try to head out shortly after the snow as settled. This will mean the snow is untouched by footprints, has not had the chance to melt and hasn’t had the opportunity to turn muddy or slushy. If you are capturing people having fun in snow then you don’t need to worry about the condition of the snow.
Cloudy Days
When photographing under cloudy skies the lighting is flat and there is little contrast meaning that the sky and the land blend into one continuous scene without much distinction. To overcome this, you need to again turn to your exposure settings. Increase your exposure to bring out the details but find the right balance but know that overexposing can wash out highlights and eliminate subtle textures. Consider shooting elements of the foreground such as trees, wildlife or structures as this will add some depth and definition to your scene.
Final Thoughts
Even if you think the conditions are not promising, we guarantee you will be able to get some great shots this winter – you don’t even know what magic you could end up capturing! Locations are also likely to be quieter in winter which makes for a more peaceful photoshoot experience. So, wrap up warm, step outside, brave the cold and shoot the beauty of winter.
Winter brings a unique set of challenges for those heading out on photoshoots, with the risk of accidents higher due to things like icier surfaces. Protect your camera equipment by insuring it with us today so you are covered for any mishaps that may happen during your winter shoots.
Feeling ready to capture the perfect winter photo? Read our guide to make sure your camera is just as prepared for photographing in cold, winter conditions as you are. Winter photoshoots require the right preparations so don’t miss out on these essential tips.