
DSLR Camera for Christmas? Here's what you need to know...
By Soraya Pathmanandam,
2 January 2025, 10 min read
Congratulations! You have upgraded from a digital camera to a DSLR. A DSLR brings endless opportunities to improve the image quality and creativity of your photos. This will be an exciting shift in your photography journey but there are a few things that you ought to know before you get started.
Through our guide, you will become familiarised with the different mechanisms of your camera, its maintenance, protection and some photography styles with their ideal settings. Let’s get started!
Camera set-up
It is essential to read the user’s manual before attempting to use a camera for the first time. Cameras are complex, so it is best to understand its functions and settings.
Some key features are:
The mode dial. This is the dial that tells the camera how much control you want over its various settings. To change the mode, you rotate the dial (using your thumb is easiest). Most mode dials have a number of options which will include an “Auto” mode for full automatic, and an “M” mode for full manual.
It also has “P” mode for program automatic which allows you to have control over settings like exposure compensation, ISO, and white balance.
Exposure compensation(+/-).This allows you to manually adjust the brightness of an image by overriding the camera’s automatic settings. It helps when the surrounding lighting is unevenly distributed, filters are applied, for non-standard processing, and if the image is under- or over-exposed. This will give you the ability to increase or decrease the exposure.
Control wheel for Shutter and Aperture. If you are in shutter priority mode, the control wheel will increase and decrease the shutter. If you are in aperture priority mode, the control wheel will increase and decrease the aperture settings. This gives you the ability to control the amount of light that enters the camera lens and the speed of the opening and closing of the shutter.
Zoom. There are numbers on top of the camera lens which indicates the focal length of the lens, also known as the zoom range. A lower number relates to a wider view, whereas turning the zoom ring increases the focal length and brings the subject closer.
White Balance. You should adjust this to make the colours look more realistic and to ensure that any white subjects hold true to their colour. The default setting on most cameras is “Auto” white balance, which works well.
In auto white balance mode, your camera examines the scene you are trying to capture and chooses a colour temperature it thinks is suitable.
However, if you would like to change this manually, here are some common white balance settings measured in Kelvin (K):
Daylight: 5500K
Cloudy: 4000K
Shade: 6500K
Check the results and if necessary, adjust the white balance until the colours look natural.
Focus ring. With your camera in manual focus mode, the focus ring can be turned to bring the subject of your shot into sharp focus. Adjustment too far in either direction and your subject will be blurry or fuzzy.
Auto focus mode. When you are photographing a still subject, it is best to use Single Area Focus mode or AF-S. For a subject that is continuously moving, you should use Continuous Focus mode or AF-C for your camera to actively track your subject.
ISO. Increasing the ISO number makes the camera’s sensor more sensitive to the light, and reducing it decreases the sensitivity to the light. It allows for shorter exposure times and is ideal in low-light situations for reducing the possibilities of blurred images caused by shaking the camera.
ISO will stay at a range between ISO 100 and ISO 400, which allows most cameras to produce high quality clean images but being able to change the exposure gives you more control in lighting changing conditions.
Protecting your camera
Ensuring the safety of your camera is the next step. One of the key aspects to focus on is protective cases. The ideal bag or case depends on what type of photographer you are:
Landscape photographers – a camera backpack would be best for extra security.
Hobby/Recreational photographers – a small shoulder bag would be best for quick access
To add to the protection of your camera you should also have the following items:
Camera straps - which you can attach to the camera to prevent it hitting the floor if dropped.
A protective case - fitted onto the camera body which gives it some extra protection in case you drop it.
Lens caps - this is a cover to protect the camera lens from scratches and debris
Dust shields - it is a disposable filter to minimise the level of dust that collects on the camera
While you are looking protecting your camera, another important protective measure is insurance.Camera insurance is vital in ensuring that your equipment is covered while you are busy capturing various photos. Depending on your skill set from amateur to professional levels, there is an insurance cover for you!
Using your camera for the first time
When taking your camera out for the first time, you should be mindful of how you use it properly.
Handle with care. Your camera is fragile, although it may look bulky and able to withstand anything. Ensure you are holding it correctly when taking a picture, firmly grip the side with one hand and use the other to cradle the bottom of the lens or camera body. This will stabilise the camera and help ensure its safety whilst taking a photo.
When you are changing the lenses, ensure you are cautious when releasing it so not to force it. There should be no resistance when removing the lens from the camera. If you apply too much force, you can cause damage to the mounting, electrical contacts, zoom, and autofocus mechanisms, even the internals of the camera could get broken.
When taking a photo, secure the lens cap where it will not be damaged and out of the frame, usually kept connected to your camera by a string or in your camera bag for safe-keeping.
Taking pictures
When it is time to use your new camera, there are many ways to use the range of settings available. Here are some tips on the best settings to use for some common photography formats:
Portraits
Camera mode: Manual
White balance: Match the light of your scene
ISO: 100
Aperture: f/2.8
Shutter: 1/100th second
Lens: 60mm or 85mm
Focus: AF-S

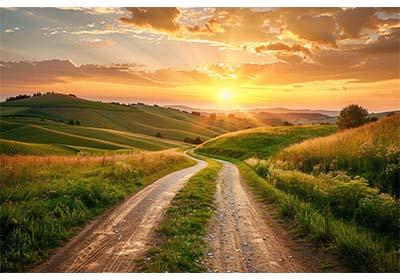
Landscape
Camera mode: Manual or Aperture Priority
White balance: Auto
ISO: 100
Aperture: f/11 to f/16
Shutter: 1/100th second
Lens: 16-35mm and 70-200mm
Focus: AF-S
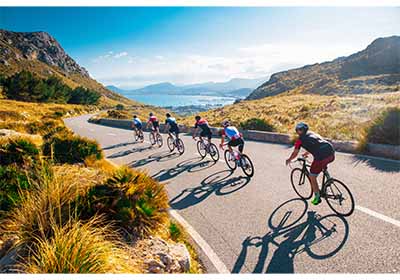
Sports
Camera mode: Manual or Burst
White balance: Auto or from 4000K to 5000K
ISO: Auto
Aperture: f/2.8
Shutter: 1/640th second
Lens: 100-500mm
Focus: AF-C
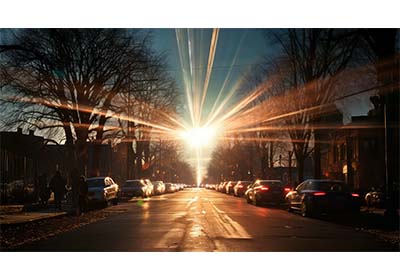
Starbursts
Camera mode: Manual
White balance: 4000K and 5500K
ISO: 100
Aperture: between f/11 and f/18
Shutter: shutter speed priority
Lens: 28-105mm (wide angle)
Focus: Aperture priority
Black and white
Camera mode: Monochrome or B&W
White balance: Auto
ISO: 50 or 100 (Low)
Aperture: f/1.4
Shutter: Slow
Lens: 50mm or 35mm or 85mm
Focus: AF-S

Cleaning your camera
To keep your camera looking brand new to increase its longevity, you need a cleaning kit:
Microfiber cloths
A high-quality cloth is the best product to carefully clean off dirt, dust, and oily stains. It does not scratch the lens and can be used for both wet and dry cleaning. You must not use the cloth that is being use to clean your lens for any other purpose as it risks dirt and debris from other objects getting onto the cloth which can damage your camera lens. Also ensure to wash your microfiber cloth carefully.
Air Blower cleaner
An air blower cleaner is a small manual pump that blows off the dust from the lens. It is useful because it helps get rid of dust from places your cloth can't. For instance; textured services; around the buttons; and in hard-to-reach places, like the edges of the lens.
Lens cleaning solution
The solution is designed for photographic use and is safe for cleaning the lens and camera body. The solution contains the proper chemicals to remove dirt and bacteria without affecting the glass quality of the lens.
Lens cleaning pen/brush
The brush helps remove dry particles without damaging the lens. This tool is best for removing small stains or fingerprints from the camera lens effectively.
This kit can be stored in your camera bag along with your camera.
Final thoughts
Hopefully with this guide you feel more equipped to use your new digital camera to its full potential. By having the right tools to protect and care for it along the way, you will be able to enjoy your camera for years.
For more articles like this, why not have a look at:last gasp for the dslr, photographing the British countryside, 6 tips for urban photography, wedding photography tips.